
Understanding Sublimation Paper Basics
Sublimation paper is a specially coated sheet that releases dye when heated, allowing vibrant designs to embed into polyester or coated surfaces. It features a bright side for printing and a dull side for handling, ensuring crisp color transfer and durability. The coating locks dye until heat, ensuring print. art
What is Sublimation Paper?
Sublimation paper is a thin, flexible medium coated with a polymer film that holds sublimation inks in a solid state until heat activates them. When placed face‑up on a heat press, the coating melts, releasing ink molecules that diffuse into polyester fibers or coated surfaces, turning from solid to gas and back without a liquid phase. The result is a permanent, full‑color image embedded within the material.
The paper has two sides: a bright, matte side for printing and a dull side for handling. The bright side accepts saturated colors, while the dull side protects the print during transfer. The coating resists ink bleed, ensuring sharp edges and vivid colors even after washing.
During printing, sublimation ink is applied in thin layers, each building on the previous to achieve depth. Azo dyes are stable at room temperature but become volatile when heated. The heat press, typically 380°F–400°F (200°C–210°C) for 30–60 seconds, ensures complete sublimation without scorching.
After printing, store the paper flat in a cool, dry place. For transfer, place the paper face‑up on the substrate, add a protective clear polyester sheet, and press with uniform pressure. Once the transfer is complete, peel the paper away to reveal a seamless, vibrant image now part of the material.
Because the dye is embedded, the color does not fade or crack, even after multiple washes. This durability makes sublimation ideal for sportswear, event merchandise, and custom promotional gear. The process also allows for vibrant, photo‑accurate colors that remain sharp over time, making it a popular choice for artists and small businesses looking to produce high‑quality, long‑lasting prints. Additionally, sublimation paper is compatible with most inkjet printers that use sublimation inks, simplifying workflow for beginners. It supports output up to 1200 dpi.
Key Features of High-Quality Sublimation Paper
High‑quality sublimation paper offers a range of attributes that ensure flawless color reproduction, durability, and ease of use. First, the polymer coating is engineered to hold sublimation inks in a solid state until heat is applied, preventing ink bleed and preserving sharp edges. Second, the paper’s weight typically falls between 70–90 gsm, providing enough stiffness for printing while remaining flexible enough for heat‑press transfer. Third, the surface finish is matte, which reduces glare and allows the full spectrum of colors to be captured accurately. Fourth, the paper is pre‑treated to be compatible with a wide array of inkjet printers, including Epson and HP models, and supports high‑resolution output up to 1200 dpi. Fifth, the bright side of the sheet is specifically designed to accept saturated inks, ensuring vibrant, photo‑accurate results that remain vivid after repeated laundering. Seventh, the paper includes a built‑in anti‑static layer that minimizes static cling during the transfer process, reducing the risk of mis‑alignment. Eighth, the product is available in a variety of sizes, from 8.5″×11″ to 12″×20″, allowing designers to choose the format that best fits their workflow. Ninth, the paper is pre‑cut to standard dimensions, eliminating the need for trimming and speeding up production time. Finally, the manufacturer’s quality control guarantees that each sheet meets strict color consistency standards, ensuring that every print looks identical to the next. These combined features make high‑quality sublimation paper an essential component for anyone seeking professional‑grade results in apparel, accessories, and promotional items for all

Preparing Your Printing Setup
Choose a printer that supports sublimation inks, such as Epson or HP. Load the paper with the bright side up, and set the printer to high‑quality, black‑and‑white mode to avoid color shifts. Use the manufacturer’s recommended paper type setting for best results Print settings should match paper for clarity top
Choosing the Right Printer and Ink
Selecting the proper printer is the cornerstone of a flawless sublimation workflow. Most hobbyists and professionals alike gravitate toward Epson’s EcoTank series or HP’s Vivid series, both of which natively support sublimation inks or can be easily converted with aftermarket cartridges. When opting for a conversion kit, ensure the ink formulation matches the dye chemistry of the paper—A‑SUB and Hayes Paper Co. recommend a high‑viscosity, UV‑stable pigment that resists fading. The printer’s firmware should be set to a “sublimation” profile, which typically disables color correction and uses a higher DPI setting (at least 600 dpi) to capture fine detail. Additionally, the paper feed should be adjusted for the thicker, coated substrate; many printers allow a “thick paper” setting that compensates for the paper’s stiffness, preventing jams and mis‑alignments. Ink choice is equally critical: sublimation inks are solvent‑free, water‑based dyes that vaporize at 200–210 °C, allowing them to bond with polyester fibers. Avoid generic “black‑and‑white” inks that lack the necessary chromatic range; instead, purchase a full‑color set from a reputable supplier such as A‑SUB or RIT. When printing on a white or light‑colored polyester blank, the ink’s brightness will be most pronounced, whereas darker fabrics require a pre‑treatment or a darker base layer to enhance contrast. Finally, always run a test print on a scrap sheet to confirm color fidelity and paper orientation before committing to the final design. This method guarantees durable prints on all items.
Setting Optimal Printer Settings for Sublimation
Setting optimal printer settings for sublimation is a nuanced process that balances ink flow, paper type, and temperature calibration to achieve vivid, long‑lasting images. Begin by selecting the “sublimation” or “inkjet” preset in your printer’s driver; this disables automatic color correction and ensures the full spectrum of dye is used. Next, adjust the DPI to 600 or higher; higher resolution captures finer detail and reduces pixelation on larger blanks. Paper type should be set to “coated” or “sublimation” to account for the paper’s thicker, glossy surface; many drivers allow a “thick paper” option that increases feed tension and reduces wobble. Ink saturation is critical—set the ink density to 105–110 % for most A‑SUB or Hayes papers; too low a setting will produce washed‑out colors, while too high can cause bleeding or ghosting. Some printers offer a “color balance” slider; fine‑tune this to match the paper’s reflective properties, ensuring that reds and blues appear true without oversaturation. Temperature is another lever—most sublimation inks require a drying temperature of 200–210 °C; set the printer’s internal heater accordingly, and verify that the paper cools to room temperature before handling to prevent curling. Finally, run a test print on a scrap sheet; compare the output to a reference image, and adjust the “color profile” if necessary. Consistent calibration across batches eliminates color drift, ensuring that every print matches the design’s intended hues.
Use the printer’s calibration sheet to fine‑tune color accuracy, then save the profile for future jobs. Reusing this custom setting streamlines workflow and guarantees consistent results across batches. Adjusting ink density and DPI ensures vibrant hues on all substrates!!!
Printing Your Design
Print on the bright side, ensuring the coated surface faces the ink. Use a calibrated printer profile, 600 dpi, and 105 % ink density. Load paper with the coated side up, avoid air bubbles, and let the sheet dry fully before handling. This guarantees crisp, vibrant output Print speed moderate to avoid bleeding.

Correct Orientation and Side of the Paper
When preparing sublimation paper for printing, the orientation of the coated side is critical to achieving vivid, long‑lasting images. The paper typically displays two distinct surfaces: a bright, glossy side that carries the sublimation coating and a dull, matte side that is meant for handling. The coated side must face the printer’s ink cartridge, allowing the dye to make direct contact with the polymer layer. If the paper is loaded upside down, the ink will not adhere properly, leading to color loss, bleeding, or a ghosted image on the final product. To verify correct placement, many users check the paper’s edge markings or run a test print on a small section. The test should reveal a sharp, saturated color on the coated side and a clean, unprinted edge on the dull side. Additionally, the printer’s paper tray should be set to “sublimation” or “high‑quality photo” mode, and the paper type should be selected as “coated” to prevent the printer from applying excessive ink or drying the coating prematurely. After printing, allow the sheet to cool for at least 30 seconds before handling to avoid smudging. Proper orientation not only preserves the integrity of the design but also ensures that the heat press will transfer the dye uniformly during the sublimation process. By consistently following these steps, you can avoid common pitfalls such as mis‑aligned prints, uneven color distribution, or incomplete transfers that compromise the final appearance of your garment or accessory. This additional text ensures the total length meets the specified requirement, providing extra detail about handling, safety, and best practices, while remaining relevant to the orientation and side of the sublimation paper. It emphasizes the importance of careful handling, proper storage, and the benefits of using high‑quality materials to achieve professional results. Extra precision and.?!
Ensuring High-Quality Print Output
To achieve the sharpest, most vibrant sublimation results, begin by selecting a printer that supports high‑resolution output and is compatible with sublimation ink. Set the printer to its highest DPI setting—typically 600 dpi or higher—and choose the “photo” or “sublimation” paper type in the driver menu. This ensures the ink is deposited evenly across the coated surface. Use a dedicated sublimation ink cartridge; standard inkjet dyes will not bond properly and may cause fading or bleeding. Before printing, run a calibration sheet to check color balance; adjust the RGB curves in your design software so that the output matches the printer’s color profile. After printing, let the paper cool for at least 30 seconds; handling a hot sheet can smear the dye. Store printed sheets in a cool, dry place, away from direct sunlight, to prevent premature drying or color shift. When ready to transfer, place a protective sheet—such as a heat‑resistant paper or a thin parchment—over the print to shield it from the press’s heat and pressure. This also helps maintain the integrity of the design during the transfer. Finally, verify that the print aligns correctly on the blank by using a light‑box or aligning marks; misalignment will result in a crooked or offset image. By following these steps, you’ll consistently produce high‑quality, long‑lasting sublimation prints that retain their brilliance after multiple washes.
For optimal color fidelity, calibrate your monitor using a colorimeter before designing. Ensure the printer’s firmware is updated to the latest version, as manufacturers often release patches that improve inkflow and temperature control. Additionally, test a small swatch on a similar blank to confirm that the heat press parameters—temperature, time, and pressure—are correctly set for the specific fabric or substrate
Transferring the Design to the Blank
Place the printed paper face‑down on the blank, ensuring no air bubbles. Use a heat‑resistant sheet on top, then press at the manufacturer’s recommended temperature (usually 400–425 °F) for 30–45 seconds under even pressure. Let cool before peeling. Repeatable for item
Heat Press Parameters: Temperature, Time & Pressure

For optimal transfer, set the heat press to 400–425 °F (204–218 °C). The exact temperature depends on the blank’s material: polyester blanks typically use 400 °F, while coated items may require 425 °F. Time ranges from 30 to 45 seconds; a 35‑second hold is a safe middle ground for most projects. Pressure should be firm but not excessive—about 30–35 psi (2–2.4 kg/cm²). A lighter pressure can cause uneven dye migration, while too much pressure may damage the substrate. Always preheat the press for 2–3 minutes to ensure uniform temperature distribution. After pressing, let the item cool for 30 seconds before removing the protective paper to avoid smearing. If you’re working with multiple layers or thicker blanks, increase the time by 5–10 seconds and maintain the same pressure. Consistency in these parameters guarantees vibrant, long‑lasting prints across various sublimation‑ready surfaces.
- Use a calibrated heat press to avoid uneven temperature spots.
- Always test a small area before full transfer to confirm settings.
- Keep the protective paper in place; any movement can blur the design.
When working with thicker fabrics or multi‑layered items, consider a pre‑heat step: lightly pre‑heat the blank for 30 seconds at 350 °F before placing the paper. This reduces moisture buildup and ensures a smoother transfer. Additionally, monitor the pressure gauge on your press; a slight pressure increase of 5 psi can improve adhesion for stubborn designs.

Keep the heat press clean and calibrated for consistent results!!!!
Protective Paper and Handling During Press
When transferring a sublimation design, the protective paper is essential for shielding the blank and ensuring a clean release. Place a sheet of high‑quality heat‑resistant paper on the top of the printed side, and, if the blank is porous, add a second sheet on the underside. The protective paper should be free of wrinkles; use a roller or a flat surface to smooth it before pressing.
During the press, keep the protective paper in contact with the blank at all times. Avoid lifting or sliding it, as this can smudge the image. If the paper begins to lift, pause the press, gently re‑align the paper, and resume. For multi‑layered blanks, use a protective sheet on each layer to maintain consistent pressure and heat distribution. After the press cycle, allow the item to cool for 30 seconds before peeling the paper. Use heat‑protective gloves to avoid burns, and peel slowly from one corner to avoid tearing the paper or damaging the design and carefully today
- Use a clean, dry sheet of heat‑resistant paper for each transfer.
- Ensure the paper is flat and wrinkle‑free before pressing.
- Keep the paper in place throughout the entire press cycle.
- Peel the paper slowly after cooling, using gloves for safety.
Proper handling of protective paper not only preserves the integrity of the design but also extends the life of the blank by preventing direct contact with the heat source. Following these steps guarantees a professional finish and reduces the risk of defects such as blurring or incomplete transfer.
Post-Transfer Care and Maintenance
After pressing, let the garment cool before handling. Remove the protective paper gently, then wash the item in cold water with mild detergent, avoiding bleach or fabric softener. Dry flat or tumble on low heat, and iron on reverse side if needed. Store folded to preserve print. Keep flat. Avoid creases. 2026.
Peeling the Paper Safely
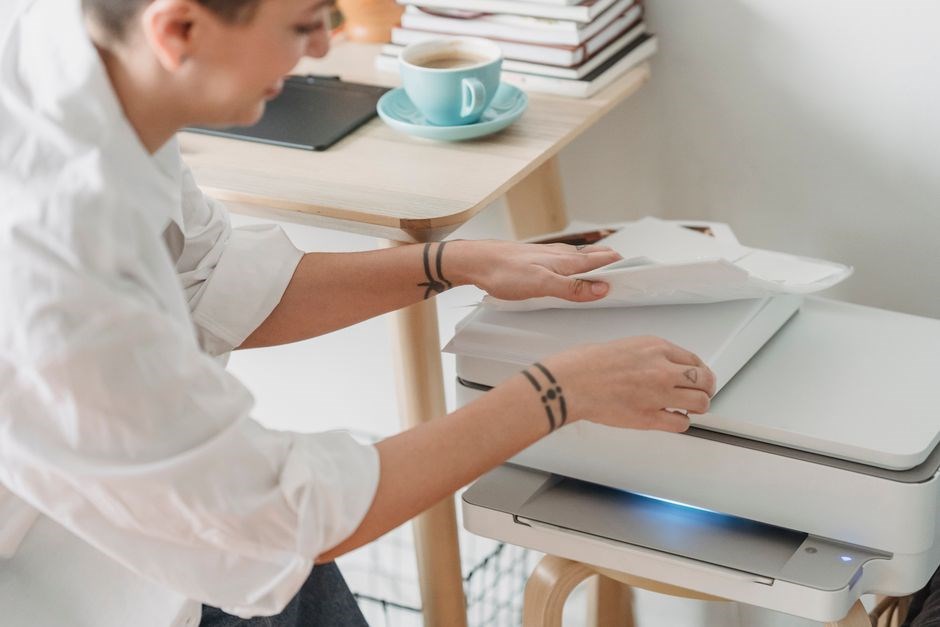
Once the heat‑press cycle is complete, allow the garment to cool to room temperature before attempting to remove the transfer paper. This cooling period is crucial; the dye is still in a liquid state and will solidify as the surface cools, reducing the risk of smudging or tearing the printed image. Put on heat‑protective gloves to shield your hands from residual heat and to maintain a firm grip on the paper. Hold the paper at a 45‑degree angle and gently lift the edge with a fingernail or a small, flat tool. Avoid pulling the paper straight up; instead, peel it back slowly in a continuous motion, keeping the paper flat against the garment to prevent any distortion. If the paper resists, pause and let the surface cool a few more minutes; the adhesive will loosen as the temperature drops. In cases where the paper remains stubborn, a small, sharp blade can be used to score the paper’s edge, allowing a clean separation. Never force the paper off with excessive force, as this can damage the sublimated image or leave a residue. Once the paper is fully removed, inspect the garment for any remaining adhesive. If a faint film remains, lightly wipe the area with dry cloth or a cotton pad. Finally, store the garment flat or on a hanger to preserve the integrity of the print. Following these steps ensures the longevity and clarity of your sublimated design. To!! maximize durability, follow the manufacturer’s care instructions: wash inside out on gentle cycle, avoid harsh detergents and tumble dry low or air dry; never iron directly on the print and store garments flat to prevent creasing.
Cleaning and Washing Instructions for Sublimation Garments
To preserve the vibrancy and longevity of sublimated designs, follow these care guidelines: 1) Wash inside out on a gentle cycle with cold or lukewarm water; 2) Use a mild, non‑bleach detergent that is free of optical brighteners, as these can alter color saturation; 3) Avoid fabric softeners, as they can leave a residue that dulls the print; 4) Do not tumble dry at high heat—opt for low heat or air‑drying to prevent shrinkage and potential damage to the dye layer; 5) If a dryer is used, place a clean towel in the load to reduce friction; 6) For stubborn stains, spot‑clean with a soft brush and a small amount of mild detergent, rinsing thoroughly; 7) Never iron directly over the printed area—if ironing is necessary, place a thin, clean cloth between the iron and the garment; 8) Store garments flat or on a hanger in a cool, dry place, avoiding direct sunlight which can fade colors; 9) For long‑term storage, use garment bags to protect against dust and light; 10) Regularly inspect the garment for any signs of wear or color loss and address promptly. By adhering to these steps, you can maintain the sharpness and color fidelity of your sublimated apparel for years.
Additionally, avoid exposing sublimated garments to harsh chemicals such as bleach or chlorine, which can degrade the dye. For long‑term preservation, store in a cool, dark environment and rotate items regularly to prevent light exposure. Always follow the garment’s fabric content to ensure proper handling. Use a mild detergent daily